
Floral How-To: Teardrop Daisy Bouquet
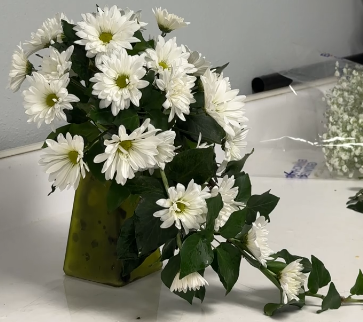
This bouquet was created as a recreation of a bride's wedding bouquet for her anniversary. Recreating a bouquet is always special because you're not just matching flowers, you're recreating a memory.
The overall look is simple, but the mechanics are doing a lot of work behind the scenes. Every flower, piece of foliage, and wired element is placed with the teardrop shape in mind. The bouquet starts with the larger open daisies arranged across the bouquet holder to establish the upper portion of the teardrop design. From there, smaller blooms are used to create the tail. This graduation in size helps the eye naturally travel down the cascade.
One of the details that makes this bouquet successful is the repetition of bloom sizes throughout the teardrop. Small, medium, and large daisy heads are wired together and repeated down the tail of the bouquet. This creates rhythm and movement while helping the cascade feel intentional rather than heavy. Israeli ruscus and ivy reinforce the shape, extending the line of the bouquet without adding visual weight.
The monochromatic white palette allows the shape and texture to take center stage. White daisies provide the primary focal texture, while baby's breath softens the design and fills small gaps.

What’s In it
Bouquet holder with foam
#9 Double satin ribbon
1 Bunch (6-7 stems) white daisies
1/3 Bunch (approx. 3 stems) gypsophila (baby’s breath)
22 Gauge floral wire
Floral corsage / stem wrap tape
Oasis cold glue
Foraged English ivy (approximately 3 stems)
3 Pieces Israeli Ruscus
How It’s Made
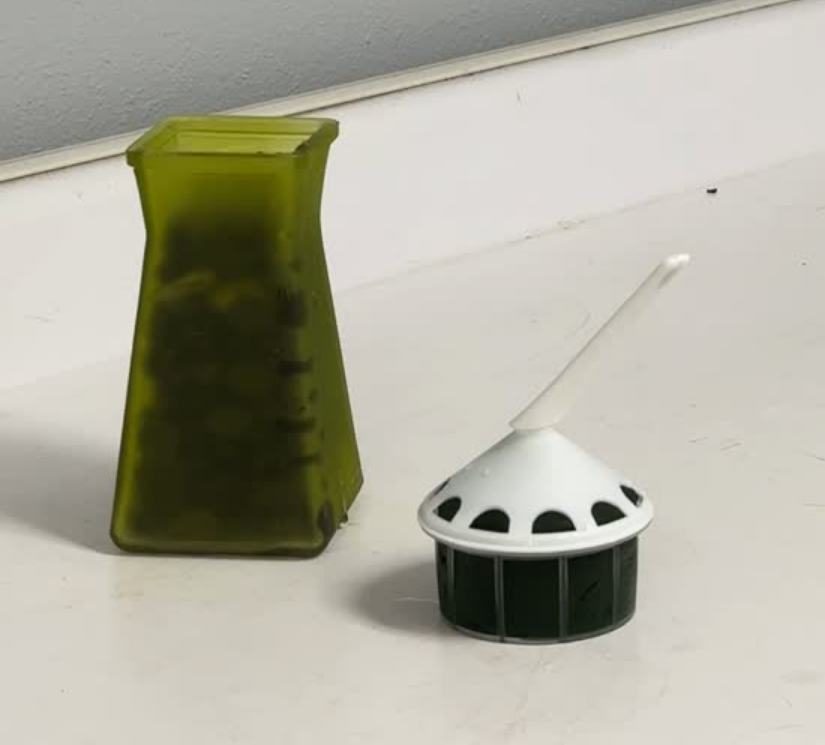
1. Prepare the Holder
Soak the bouquet holder foam thoroughly and place it in a weighted vase. A few rocks in the vase help keep the holder from tipping forward while designing.
2. Build the Foundation
Cut the Israeli ruscus into smaller sections and insert them into the back side of the bouquet holder. A small amount of cold glue on the sides of the stems helps secure them and begins establishing the teardrop outline. Be careful not to get glue on the cut ends of the stems so they can continue absorbing water.


3. Establish the Main Shape
Remove the lateral stems from the daisies and begin placing the blooms into the holder. I used floral cold glue on the sides of the daisy stems as well to add security. Remember not to glue the ends so they don’t get sealed. Start at the back edge and work toward the center using the most open flowers first. Continue checking the silhouette as you work since the overall shape is one of the most important design elements here.


4. Create the Cascade
Wire and tape individual daisy heads using 22-gauge wire and floral tape. Add a single Israeli ruscus leaf behind each bloom. Group the flowers in graduating sizes, small, medium, and large, then tape them together.
Create two sections, one shorter than the other, using this method to form the teardrop tail. Insert the wired stems through the foam, loop the wire back over, twist to secure, and trim any excess wire.


5. Add Supporting Elements
Add ivy to reinforce the teardrop shape and soften the transition into the cascade. Follow with baby's breath, using it sparingly to add texture and fill open areas without losing the clean outline of the bouquet. Remember to use glue on the sides of the stems for extra security.

6. Finish and Refine
Use any remaining smaller daisy blooms to fill gaps and refine the overall shape. Turn the bouquet over and cover the back of the holder with individual ivy leaves secured with small amounts of cold glue. Too much glue can burn the ivy and show through the foliage.

7. Wrap the Handle
Secure the double satin ribbon at the base of the handle and wrap upward to the top. Finish with a second piece of ribbon tied into a small bow. Remember to always cover your mechanics!

Design Tips
The teardrop shape is the priority. Every flower and foliage placement should reinforce the silhouette.
Repeat bloom sizes throughout the cascade. Small, medium, and large flowers create rhythm and movement.
Use foliage as structure, not filler. Ivy and ruscus help define the shape without adding bulk.
In an all-white bouquet, texture and form become more important than color. Pay attention to spacing and movement.
Step back frequently while designing to evaluate the overall outline rather than focusing on individual flowers.